Create an Active Directory User with an Exchange Online Mailbox in a Hybrid Environment
In hybrid Exchange environments, user mailboxes are managed on an on-premise Exchange server, but at-least some (if not all) of the mailboxes are hosted in Exchange Online. This allows organizations to sync Active Directory users to Microsoft 365 and manage user Exchange attributes with Exchange Admin Center instead of ADSIEDIT.
Adding users and mailboxes changes slightly when working in hybrid Exchange environments. While adding a user in ADUC, waiting for Azure AD Connect synchronization to occur, and licensing the user in Microsoft 365 is possible, the user's Exchange attributes will never be synced with the on-premise environment. In this scenario managing the mailbox in the on-premise Exchange Admin Center is not possible and, since the Microsoft 365 user is synced with Active Directory, managing attributes in the Microsoft 365 admin center is not an option either.
The above scenario is easily fixable via PowerShell, but to avoid this situation entirely, it is recommended to create new users and mailboxes via the Exchange Admin Center on the on-premise Exchange server.
Many organizations choose to manage user Exchange attributes via ADSIEDIT or third-party tools to avoid the cost and complexity that comes with maintaining an on-premise Exchange server. While this is often an acceptable solution, it is important to remember, according to Microsoft, a hybrid deployment is the only supported way to manage Exchange attributes.
Instructions
-
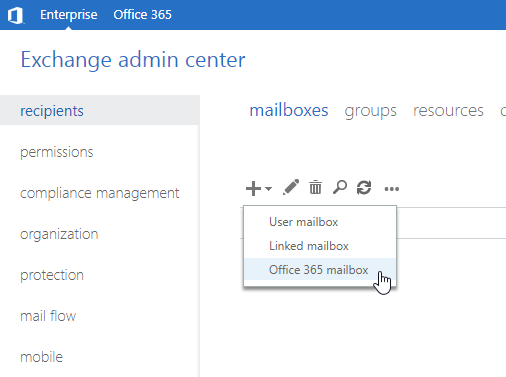
Log in to your on-premise Exchange Admin Center, select Recipients, then choose the Mailboxes tab.
-
Click on New (plus sign) and select Microsoft 365 Mailbox.
-
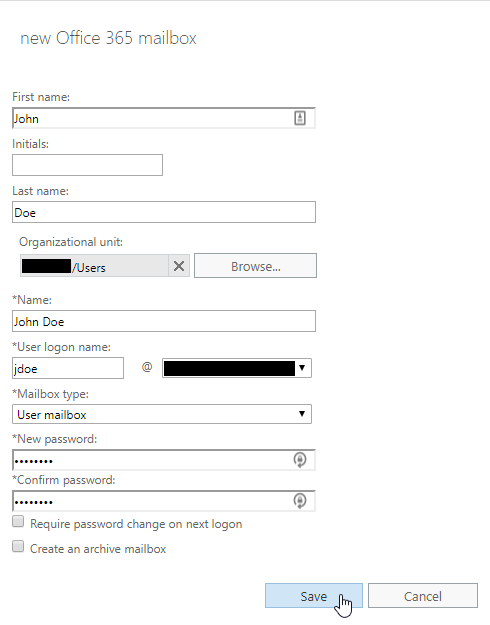
In the New Microsoft 365 Mailbox dialog, fill out the new user's details, choose the Organizational Unit where the new user object will be located, and click Save.
The UPN suffix of the User Logon Name field defaults to the internal FQDN for your domain (e.g., internal.acme.com). It is important to change this to a public FQDN that also exists in your Microsoft 365 tenant (e.g. acme.com).
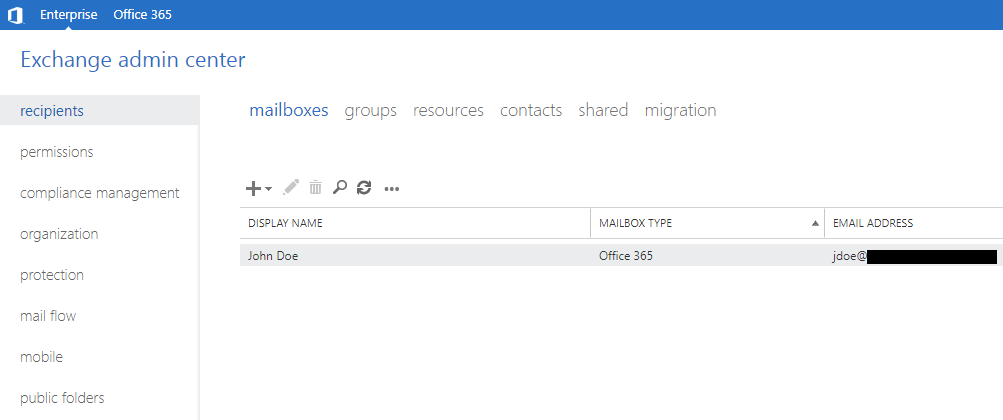
The new user should now appear in the mailbox list with a Mailbox Type of Microsoft 365.
-
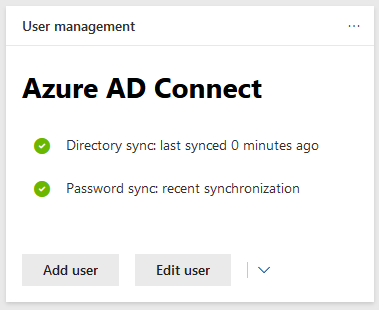
Force a synchronization with Azure AD Connect or wait for the next scheduled synchronization to occur (the scheduler runs every 30 minutes by default).
You can quickly check synchronization status by looking at the User Management card on the Home page of the Microsoft 365 Admin Center.
-
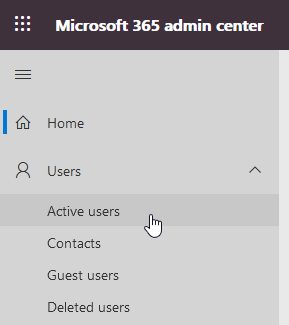
Log in to the Microsoft 365 Admin Center, click Users and select Active Users.
Click on the user's name, navigate to the Licenses and Apps tab, select the license to assign to the user and click Save.
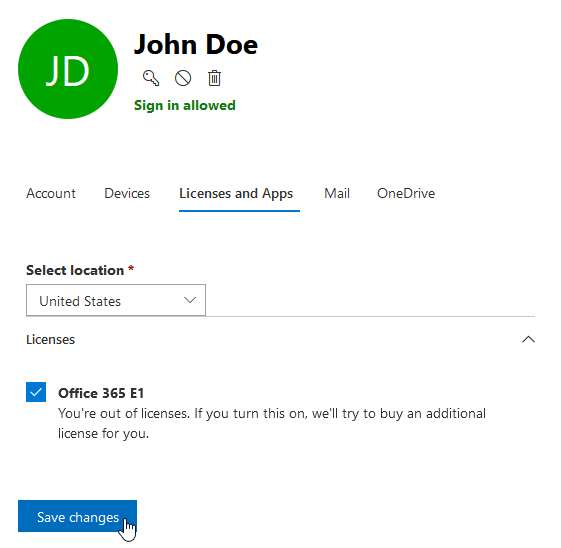
Once an Exchange Online license is assigned to the user, Microsoft 365 will provision their new mailbox.
It can take anywhere from 5 minutes to 2 hours (or more) for Microsoft 365 to provision the mailbox.